When we looked at the push-pull wire used for moving the trim tab yesterday, I didn’t like the geometry which appeared to cause quite a lot of bending.
With my seaplane I had a failure of a similar push-pull trim tab wire after 250 hours, which caused the plane to transition instantly from nice hands-off flying to having to hang on to the stick with both hands to avoid the elevators shaking to bits – something I don’t want to revisit!
I went as far as requesting Pete whether we could look at a mod to replace the rigid steel wire guide tube with a more flexible bowden cable sleeve. However, when he cautioned against mucking around with a control surface, I decided to rig the steel tube into the special hollow bolt on the elevator spar, and insert a new 2mm spring steel wire. Lo and behold, with the guide tube now properly aligned, there is hardly any flexing evident. Glad that this issue is resolved.
I then rigged up a rough angle measuring device to see how the trim tab deflections worked out.

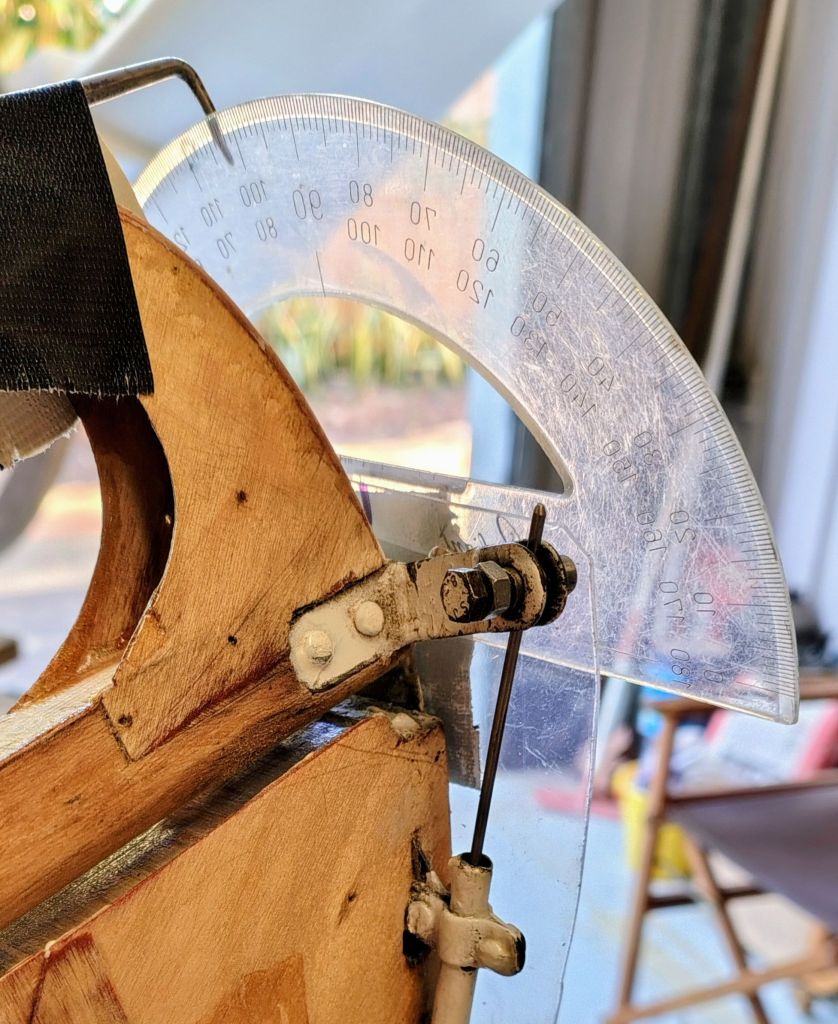
The trim tab trailing edge has a twist in it, such that when the outboard edge lines up with the elevator trailing edge, the inboard edge is deflected down about 10 deg. This results in an actual down deflection of 36 deg at the outboard end, and about 26 deg at the inboard end. The specified range per the Bocian manual is 31 +-5 deg down and 10 +-2 deg up. So the DOWN range, which is physically stopped by the trim tab horn, is in spec. There is heaps of UP travel available which is stopped elsewhere in the actuating system.
This was discussed with Pete when he came down today. He mentioned that one of his collegues at Warkworth suggested to increase the down range as an attempt to overcome the lack of nose up trim in their Bocian. However, Pete persuaded him away from that idea since this would increase the AoA of the trim tab which could cause it to stall, resulting in less rather than more trim force being available.
Pete brought with him the implements required to attach the Oratex fabric, i.e an iron and hot air gun, both with automatic temperature controls. Many thanks Pete!
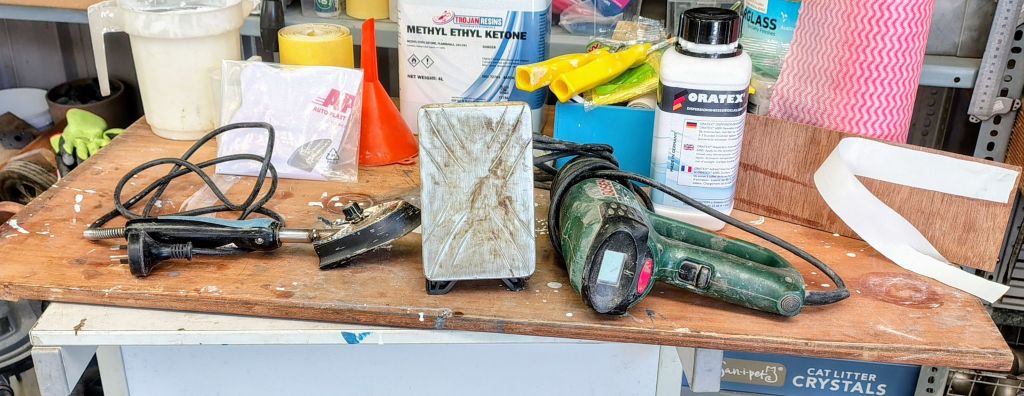
He also brought along a small non-controlled iron which will come in handy for getting the required heat into nooks and crannies.
We cut a small strip out of the roll of white Oratex 600, opened the bottle of the special glue and proceeded to attach the strip to a bit of scrap plywood. That plywood was not cleaned or degreased at all, so I’m wondering whether this is a realistic test. Anyway, it was a good starting point for Pete to highlight a few important points.
The temp. controlled iron does not have an inbuilt switch. When it is plugged in, the temperature setting defaults to 130 deg. We will really have to watch this as the fabric shrinks between 100 and 200 deg.. So if the iron when plugged in is to be used to activate the glue but without shrinking the fabric, the temp setting must be reduced to 90-95 deg.
I intend to put an on/off switch into the irons’ power supply with a label on it “SET TEMP TO 90 DEG BEFORE TURNING ON”, as it could spoil an otherwise fun day of ironing the Oratex on.
We will also have to learn to be patient with this job, as the glue needs to be completely dry before it can be activated. The drying time depends on ambient temperature, but on a warm day it can be 30 minutes or more.
I’ll be spending some time studying the Oratex manual as the process is significantly different to the Polyfiber system I have used on the seaplane wings.
I discussed the repair of the cut on the wing underside with Pete, he suggests the use of Ripstop tape. He has used it many times. If the colour doesn’t match he cuts the patch into a star shape or similar.
After inspecting the paint job on the fuselage, he suggests putting the top coat on by spraying. He also recommends using a spatter coat of cheap paint to show when sanding has been properly completed. Over to you Laurie!

Leave a comment